Rear_AC_Area.JPG
Vent1.JPG
Raise_OS_Frame1.JPG
AC_SUPPORT2.JPG

P2180211.JPG
New_Sopport_area1.JPG
New_Sopport_area2.JPG
Restoring Your LeSharo / Phasar Ceiling
(Thanks to John Blumhofer for the information and pictures.)
The LeSharo/Phasar has one seam down the middle and two end sections.
First I ordered some roof adhesive from Mobility - I think I bought 3 tubes.
Then I removed the vent and air conditioner. I also bought a large tarp to cover the RV with in case of rain, etc.
The next step was to remove the cabinets and all related wall components (cabinets and shelf in the back) so that the ceiling is completely free to work with - you will have to cut the two PVC pipes that vent through the roof - one is by the sink,the other is over the closet. You can repair them later with a PVC coupling.
I then bought 4 FRP (fiberglass reinforced plastic) 4x8 panels (they're made out of a linolium type of material that is flexible to work with.) They're available at Lowe's and Home Depot (all 4 ran me about $120)
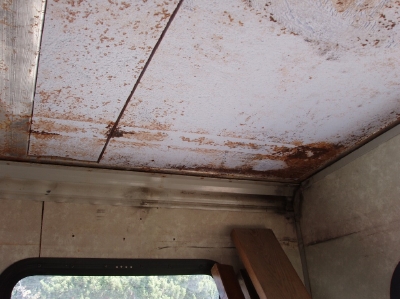
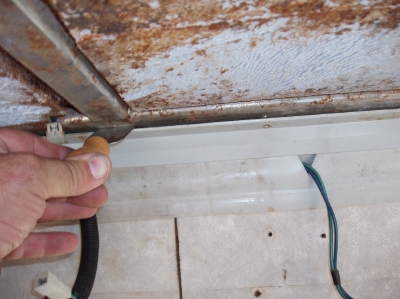
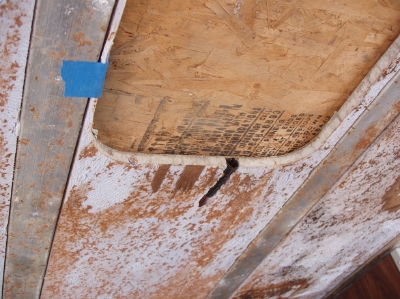
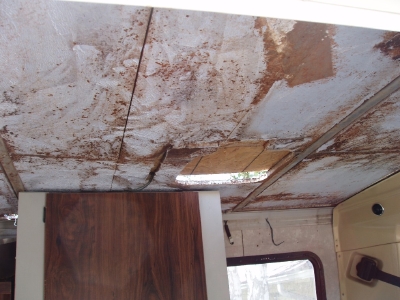
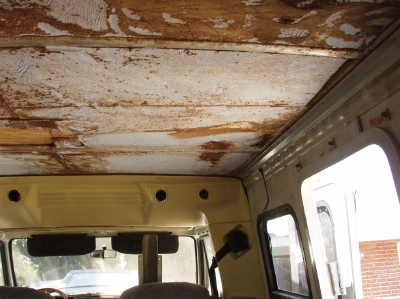
Once the walls are open so that the ceiling is fully accessable (except over the toilet/shower) you can start to scrape off the old ceiling - it's made of Luan wood. As you do be extra careful not to chop up the blue board (foam) underneath too much. A couple of plaster taping knifes worked for me. Make note of where the thin sheet metal is that's located above the cabinets under the Luan - its what the cabinet scews attach to. You will probably replace the thin sheet metal - it's is also available at Home Depot in roof materials (4" x 20 ft rolled sheet metal or such)
The new ceiling material will slide into a small groove that goes all around the ceiling, and the old ceiling may be held in place by small rivets which you may have to drill out. Once you drill out the rivets find something to scape any reminant ceiling material out of the groove.
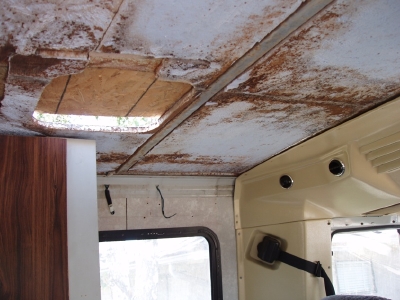
Now - when the entire old ceiling has been removed you may want to add additional support or adhesive surface for the new ceiling material to adhere to.
I'm adding (welding) in one or two cross channels - one over the door/sink area, and several horizontal sections between channels for additional gripping/adhesive surface (per Larry The Phasarholic's advice). I may do this with either steel channels or simple wood 1x2's. The steel chanels are 3/4 of an inch thick. Wood may glue easier to the roof than welding in horizontal sections. (By the way - I'm getting a few steel ceiling channels from a Phasar that's being parted out).
On the exterior, I removed the rear plastic roof end piece and then opened the roof's seam gently. Here's a point to consider - as you seperate the seam you will have a tendency to force the upper seam up - this will pose a problem later when you bring them together as the top seam (being made of thin metal) will curve upwards from the need to do so to remove the old adhesive.
On the remaining 2 sections I still need to clean again (I started a month or two ago), I may remove the blue board to access the seam from inside the RV therefore bringing the bend inwards and then creating a 2x4 support inside the cab to push upwards as the adhesive drys and bonds. Think of it as two pieces of paper overlaping each other - which way is best when resealing them back together.
Then I scraped, sanded and used a wire brush on a drill to remove the old adhesive. There are 3 roof sections - from the A/C hole to the rear of the RV, between A/C and the air vent, and from the air vent to front cab.
Mobility suggested I use small screws to hold the two seams together but I wish I hadn't ( I only did so to the rear seam). I'm contemplating alternative methods of holding the two remaining seams together now. I just did not like compromising the one section of roofing that I did by put the screws through both layers.
I also used some painting masking tape to keep the adhesive material from messing up the roof - I ran it down the outside of the seam to prevent adhesive seepage from under the seam from squeesing out of the seem onto the clean roof surface.
Anyhow - when I complete the resealing I will probably cover the seams with Etherbond - (4 inch tape that's made for the roof) also.
I'll keep you posted on my progress as I go but this should get you started and give you some thoughts to think about. Estimated time to remove cabinets, etc - about a day, removing old ceiling material - a half day unless you need to drill out the old rivets (I bought a small hand drill at Home Depot for removing rivets and unscewing the cabinets with - Skill Cordless Palm Size Screwdriver Model 2336-02 Price: $39.00/ea.. Separating and cleaning the roof seam - 1 day.
Note - the critical parts of this type of restoration is (1) bringing the roof seam together after applying the adhesive, and (2) creating sufficient adhesive surface for the new ceiling material (you don't want any sagging).
John Blumhofer
Rear_AC_Area.JPG
Vent1.JPG
Raise_OS_Frame1.JPG
AC_SUPPORT2.JPG
P2180211.JPG
New_Sopport_area1.JPG
New_Sopport_area2.JPG